Tired of expensive vet visits or the stress of trimming your dog’s nails? Dog Nail Trimming is a vital part of pet care, yet it’s often a source of anxiety for both dogs and owners.For a complete at-home grooming routine, check out our guide on how to groom your dog at home in 4 easy steps. Overgrown nails can cause pain, posture problems, and lead to more severe health issues. Whether you’re a novice seeking to learn the basics or an experienced owner looking for a safer technique, this guide provides a simple, step-by-step roadmap to successfully manage dog nail trimming at home. We’ll cover everything from choosing the right tools to understanding the anatomy of a dog’s paw, transforming this task from a chore into a calm bonding experience. Ready to make your dog’s paws healthier and happier?
Understanding the Basics of Dog Nail Trimming
Before you begin, it’s crucial to understand why regular nail care is essential. When a dog’s nails are too long, they hit the ground and are pushed back up, causing pressure on the toe joint. This forces the paw to twist, leading to discomfort and potentially long-term joint damage. Regular dog nail trimming not only prevents pain but also improves your dog’s gait and overall quality of life. According to the American Kennel Club, overly long nails can alter a dog’s posture and cause joint stress.The biggest fear for most owners is cutting the “Quick,” the pink, sensitive part of the nail that contains blood vessels and nerves. Knowing the anatomy is your first step to a safe dog nail trim.
Choosing the Right Tools for Your Dog
The success of dog nail trimming at home heavily relies on the right equipment. You have two main options:
- Scissor/Guillotine Clippers: These are fast and efficient, best for dogs with thick nails. They require a steady hand and a clear view of the nail.
- Electric Grinders (Dremel): These file the nail down slowly, making it easier to avoid the Quick. They are excellent for black nails where the Quick is hard to see. However, they require patience and desensitization due to the sound and vibration.
Always keep styptic powder (or cornstarch) nearby, just in case you accidentally cut the Quick.
5 Key Strategies for a Safe Dog Nail Trim
Successfully mastering dog nail trimming at home involves more than just a sharp tool; it requires a strategy that prioritizes comfort and trust.
- Desensitize Your Dog Early: Start by simply touching and holding your dog’s paws regularly, without trimming. Pair this with high-value treats to create a positive association.
- Location and Lighting: Choose a quiet, well-lit area. Good lighting is essential for identifying the Quick, especially on darker nails.
- The “Little and Often” Rule: It’s better to trim a very small amount of the nail every week than to attempt a major trim once a month. This keeps the Quick naturally receding, making future trims safer.
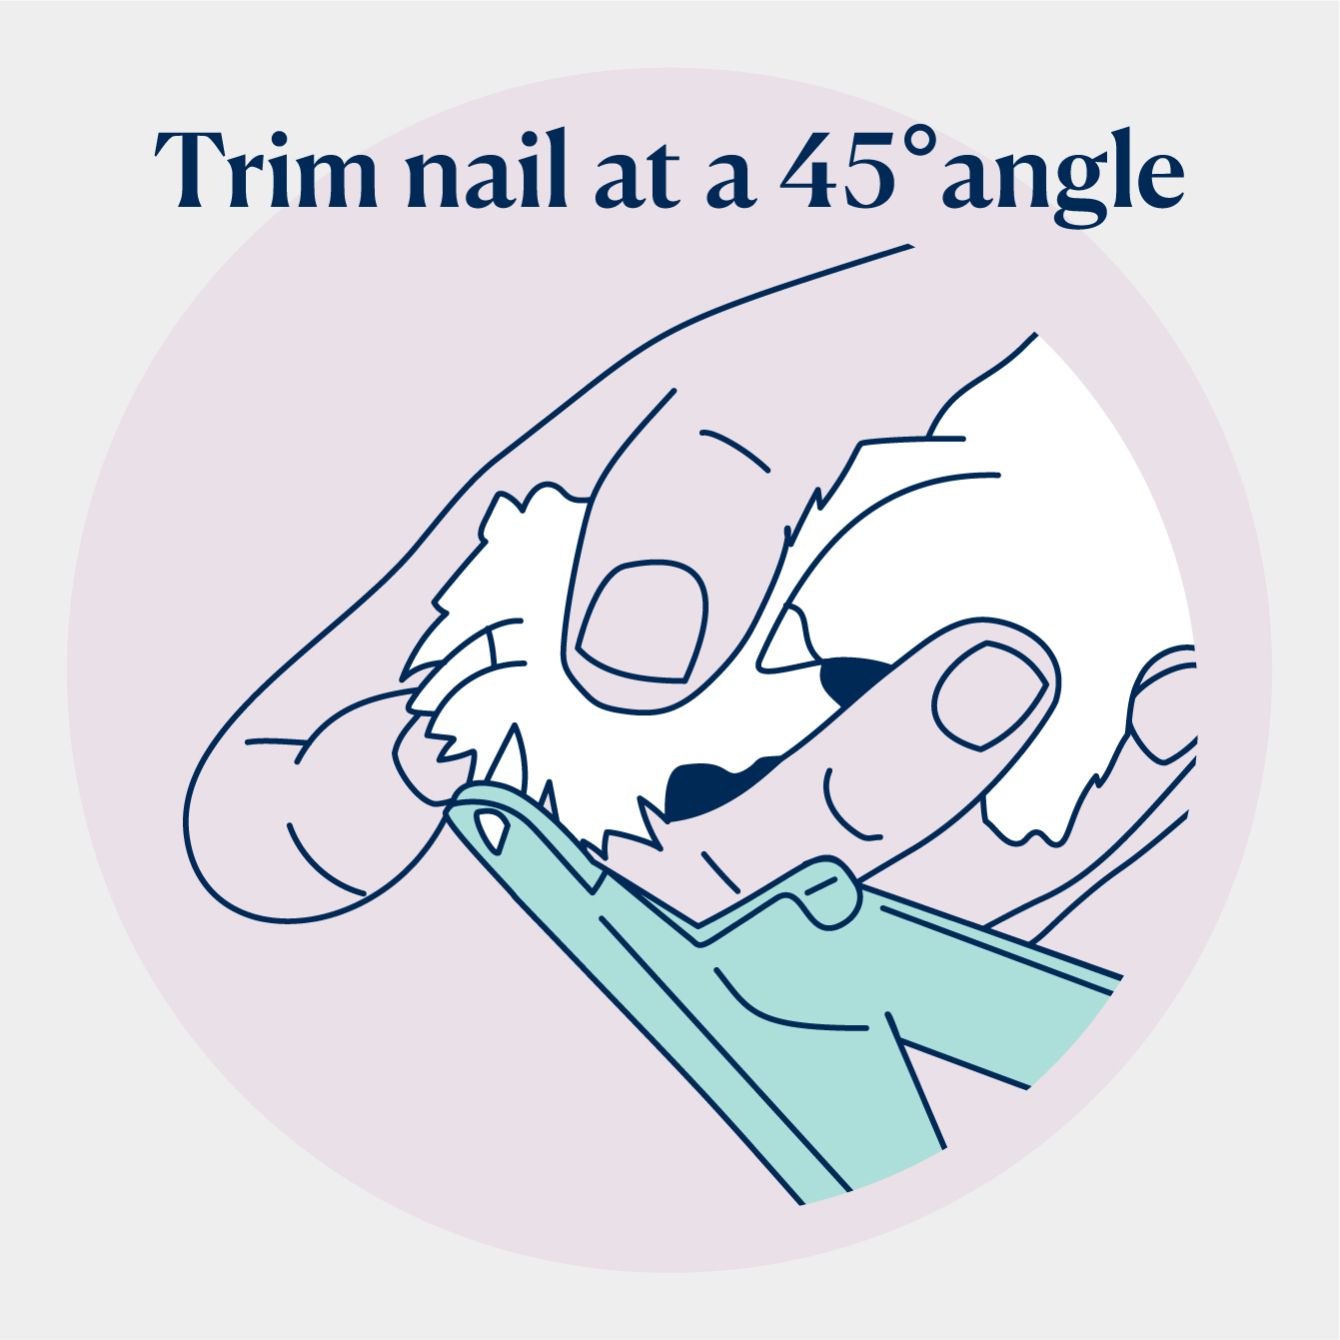
- Angle Your Cut Correctly: For clippers, cut the nail at a 45-degree angle, following the natural curve of the nail. For a grinder, use a gentle, upward motion, checking your progress frequently.
- Stop When You See the ‘Bullseye’: As you trim or grind, look at the cut surface. You will first see a white or grey outer ring, and then a small black or grey dot in the center—the start of the Quick. Stop immediately!
How to Handle Black Nails and the “Quick”
Trimming black nails is intimidating because the Quick is invisible from the outside. The safest approach is using the grinder method and removing only small shavings until you see the dull, chalky center. If you accidentally cut the Quick, remain calm. Apply styptic powder immediately with firm pressure for a few seconds. This is painful, but your calm reaction will prevent your dog from developing a long-term fear of nail trims. Consistency is key to rebuilding trust.
Recognizing When to Seek Professional Grooming
While dog nail trimming at home is achievable for most owners, there are times when professional help is best. If your dog is highly aggressive, you have a physical condition that makes it hard to hold them, or the nails are severely overgrown and require specialized tools, contact a professional groomer or your veterinarian. They can provide initial trims or offer training and desensitization sessions.
Frequently Asked Questions (FAQ)
Q: How often should I trim my dog’s nails?
A: Generally, every 2 to 3 weeks. If you can hear your dog’s nails clicking on a hard floor, they are too long and need immediate trimming.
Q: What if my dog hates the nail grinder noise?
A: Introduce the grinder slowly. Let it run while giving your dog treats, without even touching their paw. Gradually bring it closer over several days, pairing the sound with positive reinforcement.
Q: Does filing or grinding a dog’s nails hurt them?
A: No. If done correctly, filing the hard nail surface is painless. It’s a less invasive method than clipping, often preferred for a safe dog nail trim.
Compliance Statement:
This article is for informational purposes only and is not a substitute for professional veterinary advice, diagnosis, or treatment. Always seek the advice of your veterinarian or other qualified pet care provider with any questions you may have regarding your pet’s health or a specific medical condition.